Extensions
Getting Started

The4 Theme

FAQs
Sales Notification
Sales notifications are small non-intrusive popups that show when a customer has recently purchased a product on your site. It’s usually showing at the bottom of the page to catch the customer’s eye.
This creates a sense of popularity and sends a signal to visitors that people both like and trust your brand. In this way, sales notifications help you Boost sales and increase conversion rate:
- It creates the FOMO (fear of missing out) effect. This means when consumers see others are doing something, they want to do the same.
- It encourages hesitating customers to go ahead with their purchases.
- It prompts visitors to check out your products creating cross-sell and upsell opportunities. It builds long-lasting trust and credibility.
Help to boost sales and conversions with highlight features as below:
- Instantly receive real-time updates on every sale
- Manually creating virtual orders if you don’t have large numbers of orders
- Allows you to exclude products/pages you don’t want to show on notifications. All you need to do is select multiple exclude products/ page types from the select box and these products/ pages will not show on the notification
- Click tracking

1. How to install the Sales Notifications extension
From the app Dashboard -> We click Install under the Sales Notification extension.

After installing the app from App Store, make sure that had gone to Theme > Customize -> App embeds and toggled on the Sales Notification embed.

2. How to Create and customize the Sales Notification
2.1. Create a new Sale Notification

You can follow this quick video below to your first Sale pop-up.
To sep up more Sale notifications as you like, we have Settings and Design tabs here.
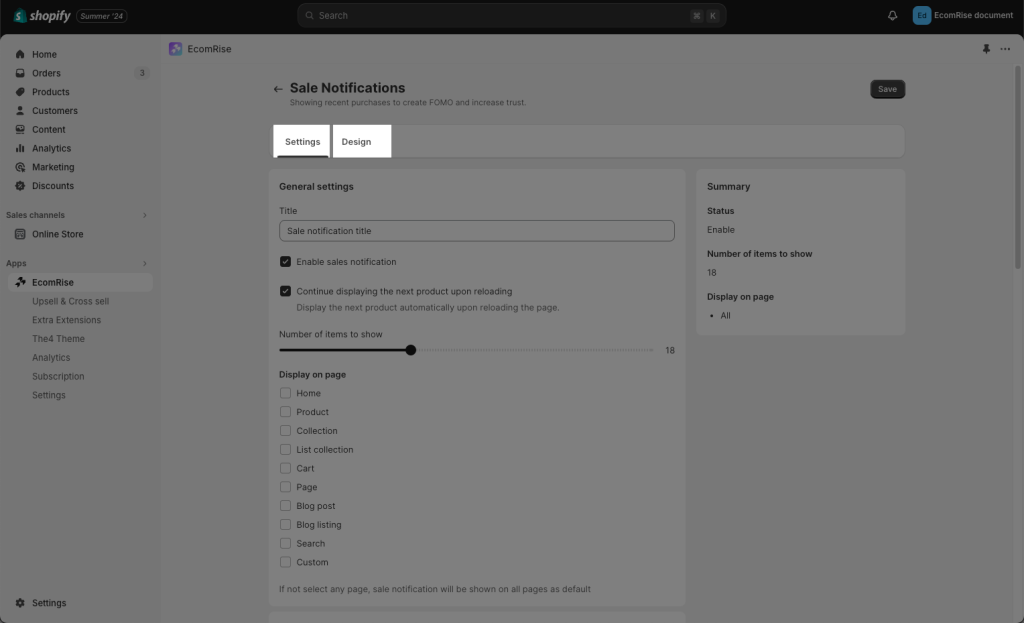
2.2 Sale Notifications Settings tab
- Sale notification title: put a name to differentiate between multiple pop-ups. This name is only visible in the app dashboard
- Enable sales notification: you can decide which specific notifications to show up or not
- Continue displaying the next product upon reloading:

- Number of items to show:
- Display on page: you choose which type of pages will have this notification working
Note: If not select any page, sale notification will be shown on all pages as the default

With Order settings, we have Automatic option to import orders from Shopify orders
These order details such as ( product title, time purchase,..customer name,..) will be the content of the Sale notification pop-up.

Result on the pop-up:

2.3. Sale Notifications Design tab
- Disable on mobile: sometimes displaying widgets on mobile is annoying to customers and takes up a lot of space. You can hide pop-up on mobile view only if you want

- Below are all the style configurations you can change such as position, colors, time display, border….And you can live preview it on the right hand, it’s how the sale notification will look on the website.

- Customer name: Full name, Only first name or Abbreviations

3. How to Edit or Translate the text labels of the extension?
To Edit or Translate the label in this extension, please open the extension -> More action -> Labels & Translate.

- First, you need to add and publish the languages in Shopify admin settings -> Languages.
We add Italian for example.

- Then you will able to see the language selector inside our app to translate this extension. Now you can use different text labels for individual language

4. Analytic
- Sessions & Visitor: count the number of visitors viewing the pop-up
- Click: count the number of visitors clicking to close the pop-up
- Sessions by device type: count the number of visitors viewing the pop-up on different devices
- Top click product: count the number of visitors clicking to product title then head to product single page

5. Upgrade plan for Sale Notification
You need to upgrade your plan to the Premium plan to use the Sale Notification extension

Still stuck? How can we help?
Table of content

Never miss a sale with preorder

