Simple Guide to Limit Purchase Quantity Per Customer On Shopify
To limit the quantity per customer on Shopify, use a dedicated Shopify app from the Shopify App Store, such as DC Order Limits or Cart Lock, to set custom quantity rules for products, variants, or collections directly within the Shopify admin. Alternatively, if you have a B2B or Shopify Plus store, you can use the built-in Quantity Rules feature in your admin under Settings > Checkout, though this is not available for all stores.
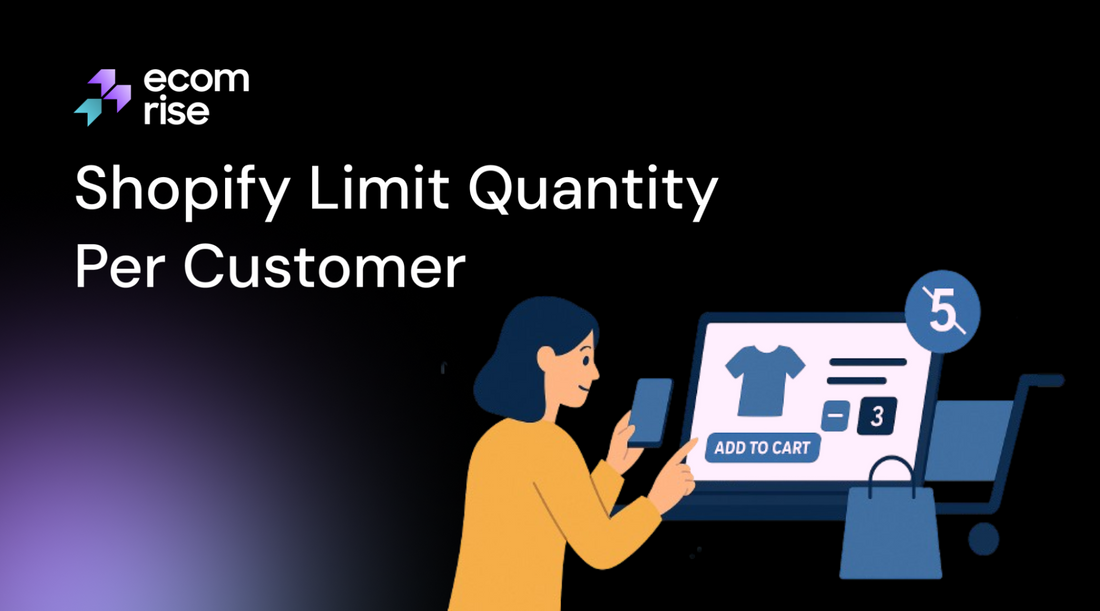
Ever launched a limited-edition product, only to see it wiped out by a handful of buyers in minutes? I’ve been there, and it's beyond frustrating. You built your brand for genuine fans, not for resellers to profit from. That's why we're tackling this head-on. In this guide, I'll show you the simplest ways to limit the purchase quantity per customer on Shopify. We’ll cover clever tricks and the best apps that put you back in control, ensuring your next big drop is fair for everyone.
When should you use purchase limits & their benefits
- For Hype Drops & Limited Editions: You built that excitement for your community, not for one person with a bot to clear you out in seconds to clear you out in seconds. A strict "one item per customer" rule is the best way to stop resellers on Shopify, ensuring fairness and getting your products into the hands of many unique fans.
- To Keep Pre-Orders Fair: Exclusive merch and pre-orders are for your loyal supporters. Simple Shopify quantity restrictions guarantee that every fan gets a fair shot, which builds the kind of community that lasts.
- To Protect Your Sales & Discounts: A flash sale is meant to attract many new customers, not just one person buying in bulk. When you prevent bulk buying of discounted items, you maximize the marketing impact of your sale and bring more people into your brand's world.
- For Samples & Freebies: Samples are for winning over new customers, not for one person to exploit your offer. Limiting trial items to one per order protects your budget and ensures your acquisition strategy works as planned.
How to set Shopify limit quantity per customer
To limit purchase quantity per customer on Shopify, you can use Shopify's built-in Add-to-Cart limit feature for a maximum quantity per item, install a Shopify app from the Shopify App Store for more advanced options, or, for Shopify Plus merchants, use Shopify Functions for deep customization. The Add-to-Cart limit is found under Settings > Checkout and restricts the total number of a single product that can be added to a cart.
Method 1: A Simple Tweak to Your Theme's Code
Let's start with the hands-on approach. If you're comfortable with a little bit of code and need a basic deterrent, this method is for you. We're going to tell the quantity selector on your product page what its maximum value is.
Best for: Merchants on a tight budget or those who just need a simple front-end barrier.
The Big Warning: Before you touch a single line of code, please, please, always duplicate your theme first! Think of it as your safety net. Go to Online Store > Themes, click the three dots on your current theme, and select Duplicate. If an issue occurs, simply remove the copy to restore things to normal.

Here’s how to set the max quantity per product on Shopify using code:
- From your Shopify admin, navigate to Online Store > Themes.
- On your duplicated theme, click the three dots and choose Edit code.

- In the theme file editor, look for the file that controls your product page form. This can be tricky as every theme is different, but you're typically looking for files named main-product.liquid, product-template.liquid, or product-form.liquid.
-
Inside this file, you need to find the quantity input field. Use Ctrl+F (or Cmd+F on Mac) and search for name="quantity" or <input type="number". You'll find a line of code that looks something like this:
<input type="number" name="quantity" value="1" min="1"> -
To limit the customer to one item, you simply add max="1" to that line. The new code will look like this:
<input type="number" name="quantity" value="1" min="1" max="1">

The Reality Check: This is a front-end fix. It stops the average shopper from adding more than one item to their cart from the product page. However, a tech-savvy user or a bot can bypass this. Think of it as a polite sign on the door, not a deadbolt. For a more robust solution, we need to bring in the experts.
Method 2: Using a Shopify App (Recommended for most stores)
To be honest, that is the path that I would suggest to nearly everyone. The safest, most powerful, and most flexible method to handle your inventory constraints without a single line of code is the dedicated Shopify app to restrict purchase quantity. The apps are designed to address the complexities on your behalf.
Best for: Any merchant who wants a reliable, set-and-forget solution that works flawlessly during high-traffic events like flash sales.
How it works: Instead of just changing the number on the product page, these apps work at the cart level. They actively check the cart's contents before the customer proceeds to checkout. If the order breaks one of your rules (e.g., more than one limited-edition sneaker), the app will display a custom message and prevent checkout until the issue is fixed.
You can set all kinds of customer purchase rules, such as:
- Maximum quantity for a specific product or variant.
- Maximum total items in the entire cart.
- Minimum or maximum cart value ($) to proceed.
- Applying rules to entire collections instead of just one product.
This is the simplest way to enforce a "Shopify limit product per order" policy across your store.
Step-by-Step Guide:
Step 1: Find the Right App
Go to the Shopify App Store and search for terms like "order limits," "quantity limits," or "limit purchase quantity." You'll find several excellent options.

What to look for: Read the reviews, especially recent ones. Review the cost to ensure it aligns with your budget. Look at the key features. Does it offer limits per product, per collection, and for the whole cart? Good support is also a huge plus. Apps like MinMaxify Order Limits are popular for a reason.
Explore some top apps for limit quantity orders now.
1. Order Limits (MinMaxify)

If you're looking for the gold standard in reliability, this is it. MinMaxify is laser-focused on one job: setting maximum and minimum order quantity flawlessly. Merchants consistently praise its unshakeable stability during the most intense flash sales. The main consideration is that it's highly specialized. It does one thing perfectly, but if you're looking for advanced features like lifetime limits or tiered pricing, you'll need another app.
2. KOR Order Limit Quantity

KOR Your big headache is KOR when there are a lot of orders made by resellers. The most effective feature of this app is that it has a limit for per customer's lifetime, which is automatically tagged for each customer. But there is a little more configuration involved with this power. The sophisticated workflow is not as essential as a merchant who will only need a simple, per-order constraint on the order; therefore, be prepared to learn a bit.
3. Orichi ‑ Quantity Breaks

Why install two apps when one can handle both sides of the coin? What sets Orichi apart is that it elegantly combines quantity limits with tiered pricing (quantity breaks). While this all-in-one approach is incredibly efficient, merchants needing extremely deep, granular control over just the limits might find a dedicated, single-purpose app offers more nuanced options. It's a fantastic generalist, but may not be the best specialist.
4. Limitsify: Min & Max Limits

Limitsify provides the merchant with the ability to have more granular control than merely counting the number of items. Rules can be configured by the price of the cart, the weight of the item, and so on. One of the reasons why merchants choose it is that it works well with tricky Ajax "drawer" carts. The downside of this strength is that so many choices of rules can be overwhelming to a novice who only wants to establish a single product limit.
5. Avada Order Limit Quantity MOQ

For merchants starting or looking for a cost-effective solution, Avada is an incredible entry point. Its major draw is a very generous free plan that capably handles both maximum and minimum (MOQ) order quantities, perfect for everyday rules. The main thing to consider is that the free version has usage limits, and for a mission-critical, high-traffic product drop, some merchants may prefer the peace of mind that comes with a specialized, paid tool.
Step 2: Install and Set Up
Click on the Add App and proceed with the instructions to install the app on your store. After installation, you usually see the dashboard of the app in the Apps section of your Shopify administration.
Step 3: Create Your First Rule
The interface of every application is different, but the logic is always similar. You will find a button that will say Create Rule, New Limit, or something of a similar type.
Step 4: Determine the Conditions of the Rule
It is here that you give the app what you would like to restrict. More often than not, you will have the following choices:
- Select Products: You can either limit to selected products (such as your limited-edition drop), collections (such as your Sale collection), or to all of your stores.
- Limit the Limit: You will have the fields of Minimum and Maximum. In order to restrict the product per order to one, you would enter 1 in the Maximum field.
- Customize the Message: Good apps allow you to write the error message that a customer reads, should they break the rule. Rather than just a generic Limit exceeded you can use something more amicable, such as, Hey! In order to make it fair to everybody, this special item is restricted to one per customer. Thanks for understanding!"
Step 5: Save and Test
Save your new rule. The app will now automatically monitor every customer's cart. The best way to test it is to go to your live storefront (not a theme preview), add the restricted product to your cart, and try to increase the quantity past your limit. The app should stop you and display your custom message.
The Takeaway: This is the most reliable and user-friendly method. It gives you powerful Shopify order quantity rules without the risk of breaking your theme, making it the perfect solution for serious merchants.
The Advanced Play — Multi-Order & Lifetime Limits
So, what if you need to restrict a customer from buying more than one item... ever?
Standard limits work on a per-order basis. A determined reseller could just place five separate orders for one item each. To combat this, you need an app that can track a customer's lifetime purchase history.
Best for: Selling truly exclusive, one-of-a-kind items or running a "one per household" promotion.
How the Logic Works, Step-by-Step:
- The First Purchase: A customer named Jane finds your exclusive, one-per-person hoodie. She buys it. The app you've installed sees this purchase.
- Automatic Customer Tagging: In the background, the app immediately goes to Jane's customer profile in your Shopify admin and adds a specific tag, something like bought-hoodie-LE. You set this tag up within the app.
- The Second Attempt: A week later, Jane comes back, hoping to buy another one for her friend. She adds the hoodie to her cart and tries to check out.
- The App Validates the Customer: Before allowing the checkout, your app checks Jane's customer profile. It sees the bought-hoodie-LE tag.
- The Block: The app recognizes that a customer with this tag is not allowed to buy the hoodie again. It stops the checkout and displays a message you've written, like, "It looks like you've already purchased this exclusive item! Our one-per-customer policy is in effect."
The Takeaway: This is the ultimate tool to prevent multiple purchases and stop resellers on Shopify. If you sell highly coveted, collectible items, this functionality is an absolute must-have.
Method 3: The Official Shopify Built-In Cart Limit
Shopify has finally given us a built-in tool to do this directly from the admin. It’s simple, free, and for many stores, it might be all you ever need. It lets you set a maximum quantity for any single line item that a customer can add to their cart.
Best for: Protecting general inventory, avoiding ordering too many, and providing a benchmark between flash sales on a store-wide basis. It is the ideal place to start.
How It Works (and Its Limitations)
It is the beautifully simple aspect of this feature. You establish a limit of one number - say 10 - and then after that point, no customer is allowed to put in the cart more than 10 of one particular type of product. If they try, Shopify will stop them and show a message.
The key thing to understand is that this is a blunt instrument. It's a single, store-wide rule that applies to all products and all customers. You can't use it to limit Product A to 1 and Product B to 5. (For that kind of specific control, you'll still need an app, which we'll cover next).
How to Set Up the Built-In Limit (Step-by-Step)
Setting this up takes less than 60 seconds.

- From your Shopify admin dashboard, click on Settings in the bottom-left corner.
- In the settings menu, click on Checkout.
- Scroll down to the Advanced preferences section. You should see a setting called Add-to-cart limit. Click on it.
- A dialog box will pop up. First, make sure the checkbox for Set a maximum quantity per item that can be added to a cart is activated.
- In the Limit field, enter the maximum number you want to allow for any single item.
A Smart Tip: Shopify provides a "recommended limit" for your store based on your sales history. This is a fantastic guide to help you choose a number that prevents abuse without hurting your normal sales volume. For new stores, it defaults to 50.
- Click Done, and then make sure to click Save on the main Checkout page.
That's it! Your store-wide limit is now active.
Important Exceptions to Know
This powerful rule applies to most online sales, but Shopify has wisely made a few exceptions where it won't interfere:
- In-person sales using Shopify POS.
- Orders created manually as Draft Orders.
- B2B customers who have specific quantity rules in their catalogs.
- Products where you've turned off inventory tracking (Track quantity is deactivated).
- Products set to continue selling when out of stock.
Method 4: The Enterprise Level — Shopify Plus Scripts & Functions
If your store is on the Shopify Plus plan, you have access to the ultimate level of customization: Shopify Scripts and the newer Shopify Functions.
Best for: Large-scale businesses with complex, unique needs that off-the-shelf apps can't solve.
How it works: Scripts and Functions are small pieces of code that you (or your developer) write to customize the checkout process directly. This allows for incredibly granular control. You could write a script that says:
- "Allow VIP customers (identified by a tag) to buy up to 5 units, but limit all other customers to 1."
- "If a customer from a specific country tries to buy more than 2 of this item, block the sale."
- "Limit a customer to one purchase of this item per 24-hour period."
This is the definition of advanced Shopify checkout customization. It requires a developer who understands Shopify's systems, but the power it gives you is unmatched.
Also, since Jun 30, 2026, Shopify Scripts will be removed; you cannot use it anymore. Merchants are encouraged to use Shopify Functions. You can read more information about Shopify Script here.
So, Which Strategy is Right for You?
Let's break it down into a simple choice:
- Choose Theme Code if: You have zero budget, you're comfortable editing code, and you only need a very basic deterrent for casual shoppers.
- Choose a Shopify App if: You're like most merchants. You want a powerful, reliable, and easy-to-use solution to set order quantity rules without any technical headaches. This is the best starting point.
- Choose a Lifetime Limit App if: Your core business involves selling truly exclusive, one-time-purchase items, and you need to stop dedicated resellers cold.
- Start with the Built-in Shopify Limit if: You need a simple, free, store-wide safety net. If your goal is just to prevent accidental huge orders or apply a single rule to every product, this is the fastest and easiest solution.
- Choose Shopify Plus Scripts if: You are a large enterprise with a development team and need to build complex, custom purchase logic that no app can provide.
UI/UX Tips to Make Quantity Limits Customer-Friendly

To make quantity limits user-friendly, visually indicate the limit and instantly give positive or negative feedback to the user when they try to cross it, such as by turning off a button or a big error message. Make the input mechanism easy to manipulate (e.g., steppers or sliders), and provide clear instructions on the limit (e.g, a "Limit 5 per household" label). Make sure to design it in a way that is similar to other user interfaces to minimize the learning curve and use the white space to eliminate clutter.
Displaying the Limit
- Clear Labels Display the quantity limit on the product page in clear and concise language, e.g., "Max 5 per customer" or "Item limit: 5".
- Visual Indicators: To have cases when the user has already reached the limit, the visual indicator is to turn off the Add to Cart/increase/decrease quantity button to indicate to the user that they have already reached the limit.
- Real-time Feedback: The feedback should be provided at the point of real-time as the user changes the quantity. Display animation or slight animations to show the quantity at hand.
Simplifying Input
- Quantity Stepper: Use a stepper with plus and minus buttons to allow users to easily adjust the quantity without having to type it in.
- Sliders or Dropdowns: For larger quantities, a slider can be a good option, while a dropdown menu can be efficient for a pre-set range of options.
Explaining the Limit
- Informative Tooltips: When a user hovers over or taps on the limit information, a tooltip can appear with more details about why the limit is in place, such as "to ensure fair access for all customers".
- Contextual Information: Place the quantity limit and explanation near the quantity selector to provide immediate context and prevent confusion.
General UI/UX Principles
- Minimize Clutter: You should focus more on simplicity, eliminate the elements of design that are unnecessary, and use white spaces as a means of producing a clean and structured layout.
- Be Consistent: Be consistent in the presentation of quantity limits throughout your product or site, so that users do not need to discover new interactions to deal with other parts of the interface.
- User Testing: Run usability tests to collect user insights from real customers about their experience with the quantity limit interface, helping to identify and fix any usability issues.
- Mobile-First Approach: Prioritize a design approach tailored for mobile audiences, as many customers will access your site or app from their phones. Optimize the quantity selector for mobile screen sizes and touch gestures.
Pitfalls to Avoid When setting up the Shopify limit quantity

Pitfalls to avoid when determining the quantity limit in Shopify include: limiting the number too low, which will frustrate customers and affect sales; not testing the limits appropriately before launching the site; not aligning the limits with customer behavior or demand; and neglecting to communicate the importance of the limits to customers more clearly.
Here are the biggest pitfalls I've learned to sidestep.
1. The 'Wrong Number' Trap (Ignoring Your Data)
You decide to set a limit of 2 on a popular item. But what if your data shows that 70% of your loyal customers regularly buy 3 at a time for friends and family? You've just alienated your best customers to solve a problem that might not exist. A limit that's too restrictive is just as bad as no limit at all.
How to Avoid It: Let data drive your decision. Before setting a limit, look at your typical order patterns for that product. Your goal is to stop resellers, not to create an unnecessary barrier for genuine buyers. The limit should target the extreme outliers (the person buying 20), not your average customer.
2. The "Set It and Forget It" Trap
This is the most dangerous mistake. You install an app or add code, assume it's working, and move on. Then, during your biggest flash sale, you discover it's either not working (and resellers win) or it's blocking everyone from checking out.
How to Avoid It: Test. Then test again. And then have a friend test it.
- Go Incognito: Use a private browser window to simulate a new customer.
- Try to Break It: Actively try to add more than the allowed quantity.
- Test on Mobile: Ensure it works flawlessly where most people shop.
- Complete a Real Order: Crucially, make sure a legitimate purchase (with the correct quantity) goes through without any snags.
3. The Checkout Surprise
A customer should never discover a purchase limit for the first time on the payment page. It feels like a bait-and-switch and is a guaranteed way to lose their trust and their sale.
How to Avoid It: Over-communicate. Announce the rule clearly on the product page, right near the price and "Add to Cart" button. No surprises means no frustration.
4. Forgetting About Bundles and Add-Ons
This is a subtle but costly oversight. Imagine you limit your exclusive coffee machine to one per customer. But you forgot to set a limit on the special, discounted pods that are sold separately. A reseller could buy one machine, then place a second order for 200 of the pods to sell on their own.
How to Avoid It: Think about your products as an ecosystem. When you limit a "base" product, review all its related accessories and add-ons. Do they need a corresponding limit? Your customer purchase rules need to be holistic to be effective.
5. Using a Picket Fence to Stop a Bulldozer
This is about choosing the right tool for the job. That simple theme code edit? It's a picket fence - great for casual limits. But if you're launching a high-demand product, resellers are coming with a bulldozer (i.e., sophisticated bots).
How to Avoid It: Match the tool to the threat. For any important launch or purchase, limits for flash sales, the DIY code edit is not enough. You must invest in a robust, cart-level Shopify app that provides real security.
6. The "Buy Now" Button Blind Spot
The classic "gotcha." You set up perfect Shopify cart validation rules. Still, you forget that the "Buy It Now" dynamic checkout button lets savvy shoppers bypass the cart page entirely, rendering your rules useless.
How to Avoid It: Make it a non-negotiable part of your pre-launch checklist: for any product with a strict quantity limit, go into its settings and turn off the dynamic checkout button.
Bottom line
And there you have it. Limiting purchases in Shopify is not about limiting sales, but is about having control over the way you sell. It is your ultimate weapon to make sure that you are being fair, prevent resellers, and reward your real fans. It is up to you to decide which of the less invasive code tweaks or the juicy apps to use, but now you have the playbook on how to safeguard your inventory and ensure that every launch is a success. And then do so, make those rules, and sell fearlessly. You've got this.
Still stuck? How can we help?
Table of content


Related posts

Easy Steps To Add Trust Badges to Your Shopify Product Page

ReConvert Shopify App Review: Features, Pricing Comparison

How to Add a Free Gift to Your Shopify Store- 2025 Ultimate Guide
How to Add a Shopify Thank You Page Upsell to Boost AOV After Checkout
Top 6 Shopify Favicon Cart Count Apps to Reduce Abandonment
